Step 2 Arrange your board and select your species
Pro tip!

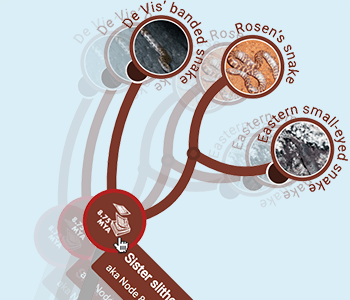
Double-click any node that has children to move its children with it (its outline will turn red). Double-click it again to move it on its own.
Your chosen tree will need a bit of adjusting to make it fit the board nicely. Click and drag the circles (nodes) around until you're happy.

Then select the species you want for each branch of the tree (and the cards). Click on the little dark selection buttons to select a species and its photo. Don't worry if the text goes over the selection buttons – the buttons won't print out on your board.
View a short video showing how to arrange the board.
To clear a board left by a previous user and start again, click the button below
Step 3 Select your colours
Choose the colour scheme for your board and cards.
Step 4 Make your cards
Click the button below to generate all of the cards for your game! Make sure you've chosen all of your species or it won't know which one to use.
If you decide to change something on the board, you'll need to make the cards again.
Step 5 Print out your board and cards
Click the button below to print or make pdfs of your board and cards.
Then trim off the edges of the board and tape the two sides together. The board has 'crop marks' – small guides on where to cut. If you're cutting with a stanley knife, line up your ruler on the crop marks. If you're using a guillotine or scissors, first draw a light line in pencil between the crop marks.


